Official Avid Learning Partner Calendar DOLBY ATMOS 205+210D: Jun 1, 2, 8, 9, 15, 16 PT101+110 Weekend: Jun 8, 9, 15, 16, 22, 23 PT101+110 Weekday: Jun 17, 19, 21, 24, 26, 28 PT101+110 Night: July 8, 9, 11, 15, 16, 18, 22, 23 PT201+210P Post: July 13, 14, 20, 21, 27, 28
** 3-4hrs per day **24-28 Course Hours
In-Person Los Angeles: 32 hrs (10am-6pm PST) PT101+110: June 6, 7, 8, 9 (Sold Out) PT101+PT110: June 13, 14, 15, 16 PT101+PT110: July 11, 12, 13, 14 Register: 888-277-0457
Upcoming Pro Tools Training
Live Online Pro Tools Certifications AVID Learning Partner Calendar
DOLBY ATMOS 205+210D: Jun 1, 2, 8, 9, 15, 16 PT101+110 Weekend: Jun 8, 9, 15, 16, 22, 23 PT101+110 Weekday: Jun 17, 19, 21, 24, 26, 28 PT101+110 Night: July 8, 9, 11, 15, 16, 18, 22, 23 PT201+210P Post: July 13, 14, 20, 21, 27, 28
** 4-hrs per day ** 6-8 Day Course In-Person Los Angeles (32 hr Class, 10am-6pm PST) PT101+PT110: Jun 6, 7, 8, 9 (Sold Out) PT101+PT110: Jun 13, 14, 15, 16
PT101+PT110: July 11, 12, 13, 14 Register: 888-277-0457
How To Use The Trim Tool In Pro Tools
Mihai Boloni
Tips and Tricks
The Trim Tool has been a part of Pro Tools since the beginning. It is one of the most efficient ways to Edit, Time-Compress/Expand, and Loop audio files. In this 2-part article we explain how to use the Trim Tool, along with all of its Sub-Tool variation.
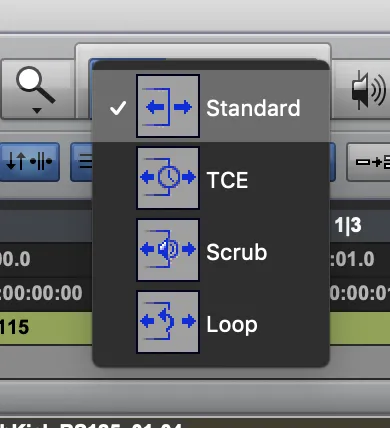
The Trim Tools is widely used for a multitude of editing tasks in Music, and Post Production. While it can be a very simple, straight-forward, editing tool, it also has a host of Sub-Tool features that allows for numerous editing variations. When you right-click on the Trim Tool, you will see a pop-up menu allowing you to pick from several different sub-tools including: Loop, Scrub, and TCE (Time Compression Expansion). For the purposes of this article we will be focusing on the Standard Trim Tool. We will follow up next week with the sub-tool variations. Let's take a look at how the Trim Tool works and how the Edit Modes can affect your workflow.
Trim Tool: Standard
The Standard Trim Tool is the primary version you will wind up using most of the time. It's main purpose is to allow you to edit media clips by clicking and dragging from the ends of the clip (beginning or end). If you click-and-drag with your mouse, from either the end of a clip, or the beginning, toward the center of the clip, you are creating an edit.
ex: click-and-drag from end of a clip, toward the center
ex: click-and-drag from the beginning of a clip
** Because edits are Non-Destructive in Pro Tools, you can also use the Trim Tool to drag an audio clip back to it's full length.
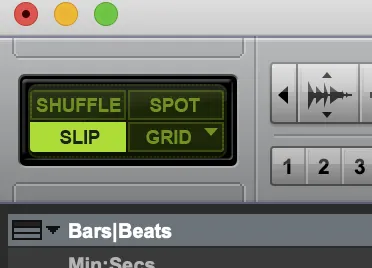
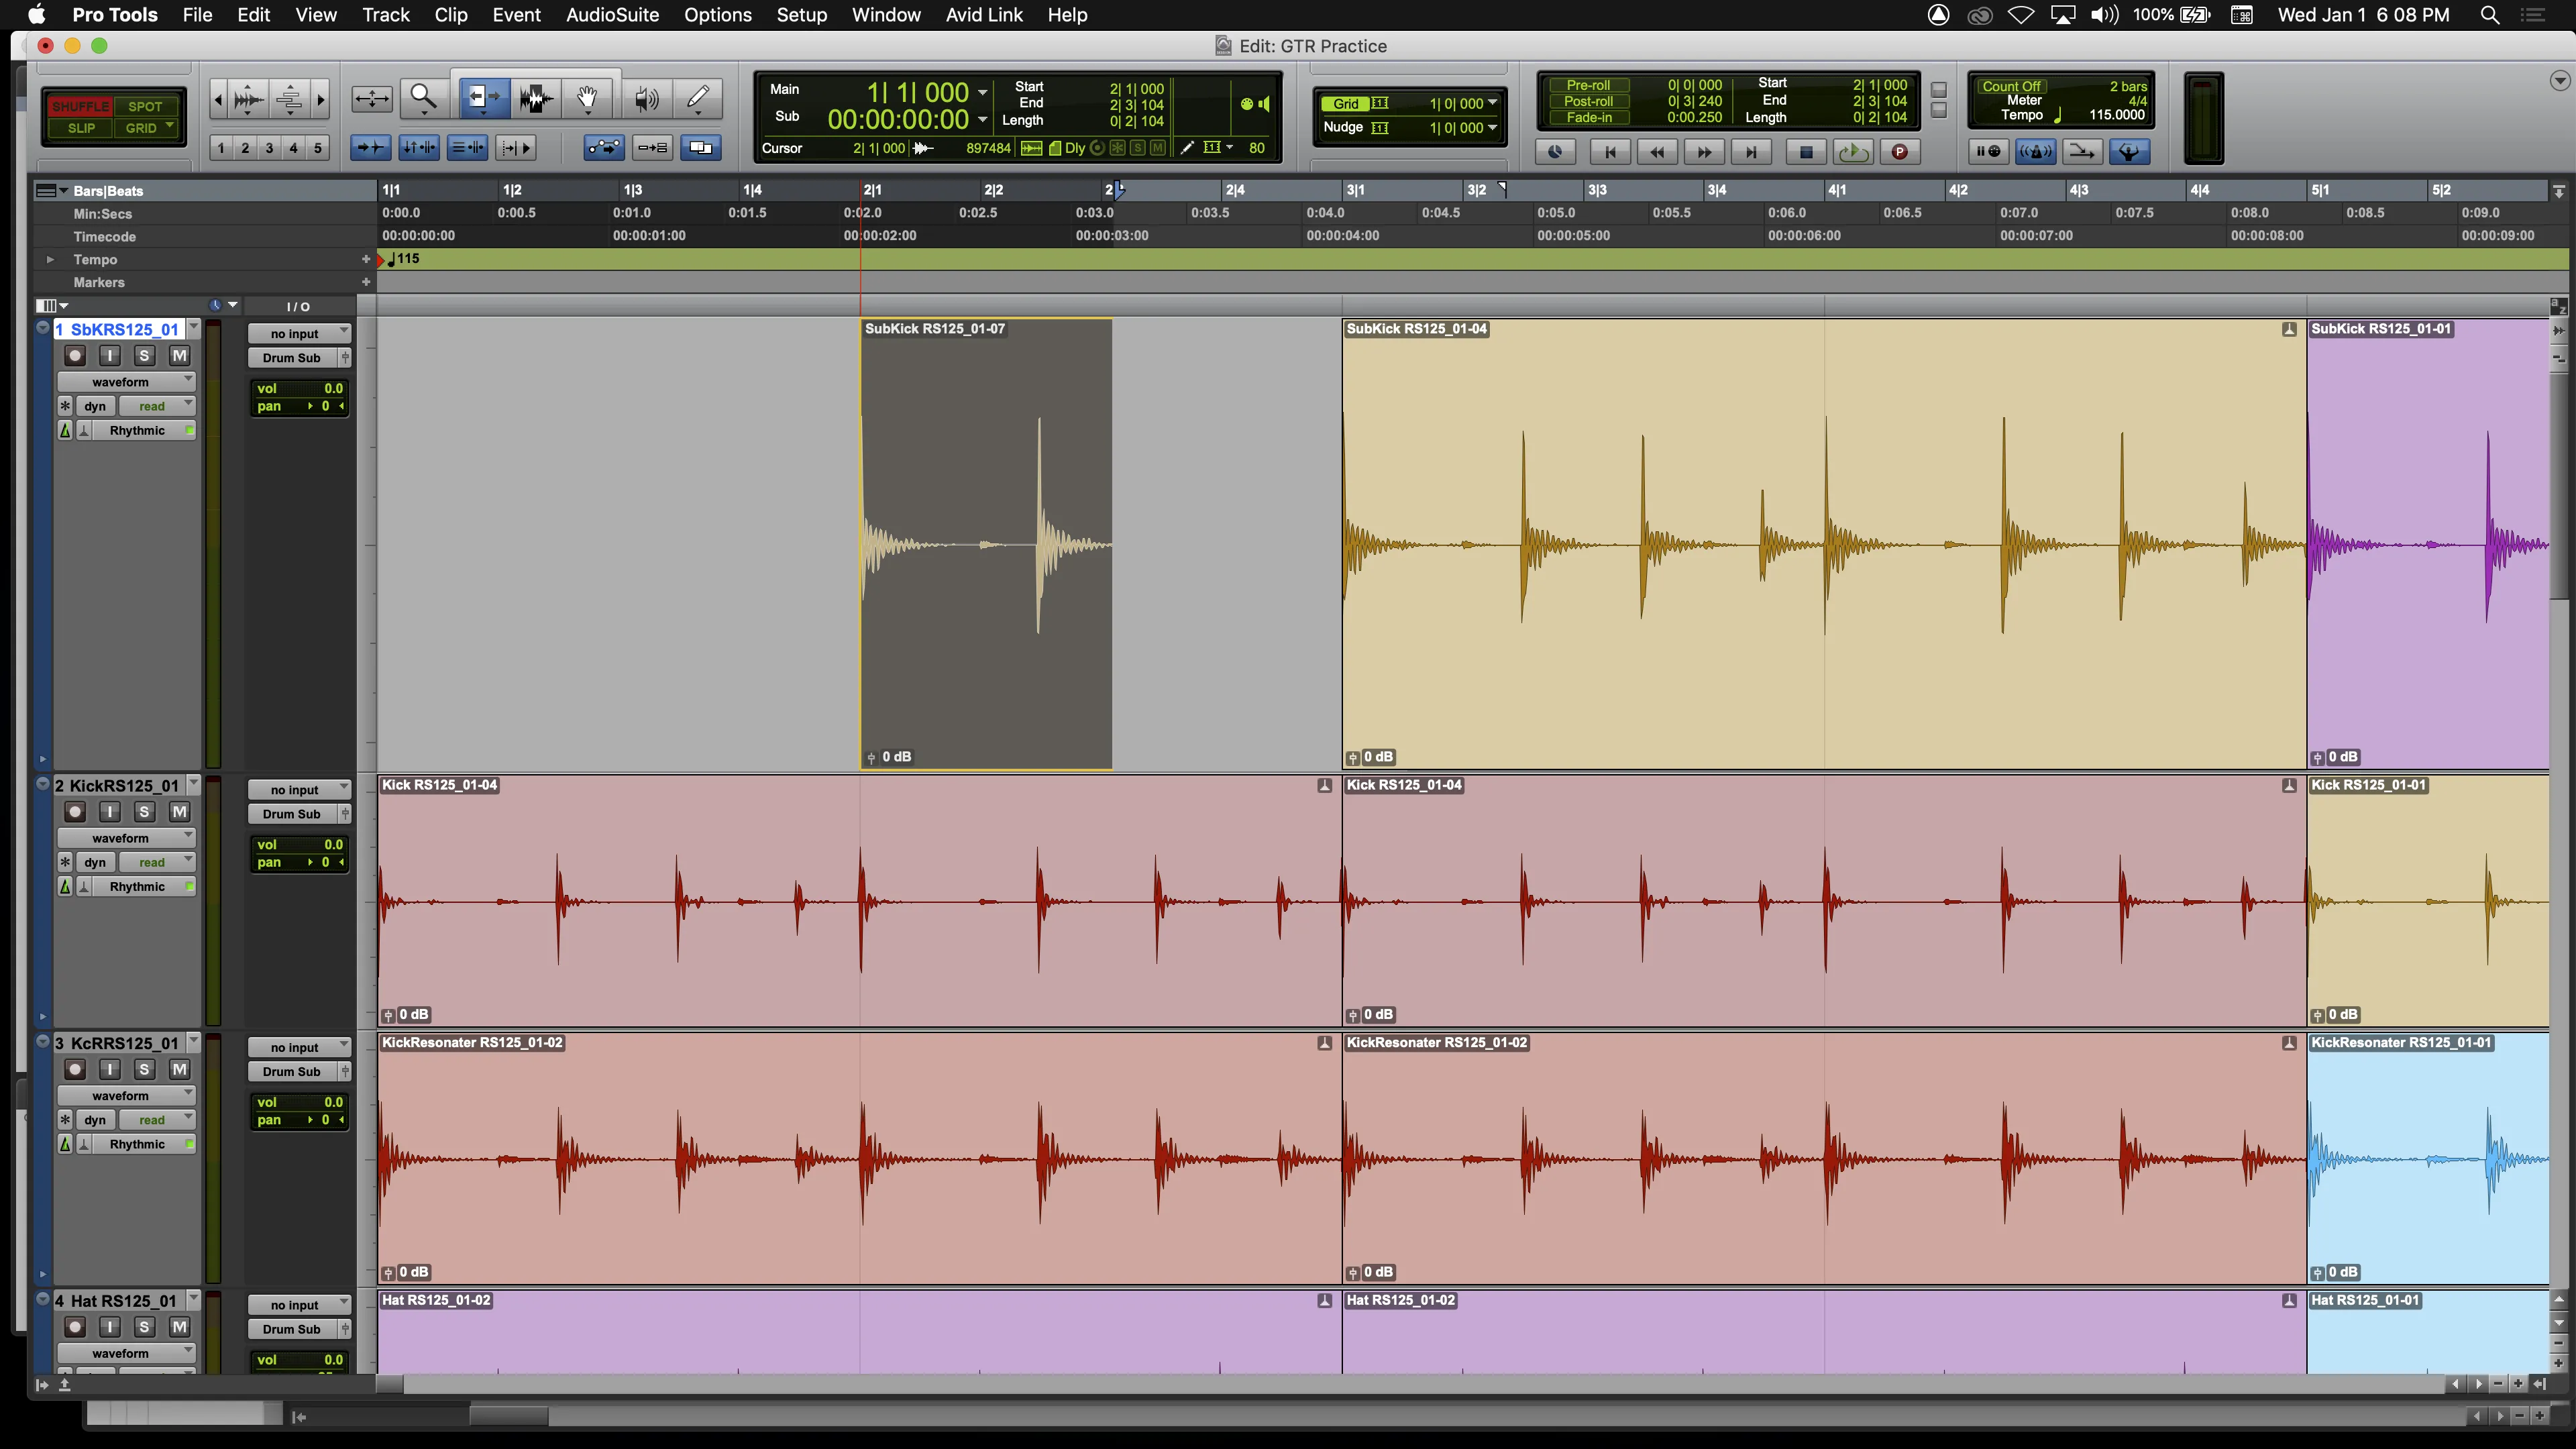
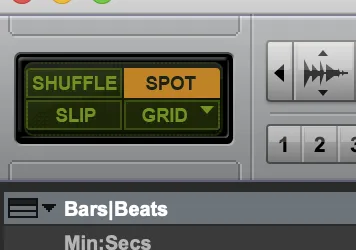
The most important thing to keep in mind when using this tool is to be aware of which editing "Mode" you are in. Each mode will dictate how the trim tool edit reacts. There are 4 different editing modes in Pro Tools: Shuffle, Slip, Spot, Grid. The tool works the same way in each mode, however, the mode will dictate how the tool gets to work.
SLIP Mode
Most people consider Slip Mode their default editing mode as it allows you to edit, move, place, copy and past, etc..., with no restrictions. You can edit a clip without affecting any of the other clips around it.
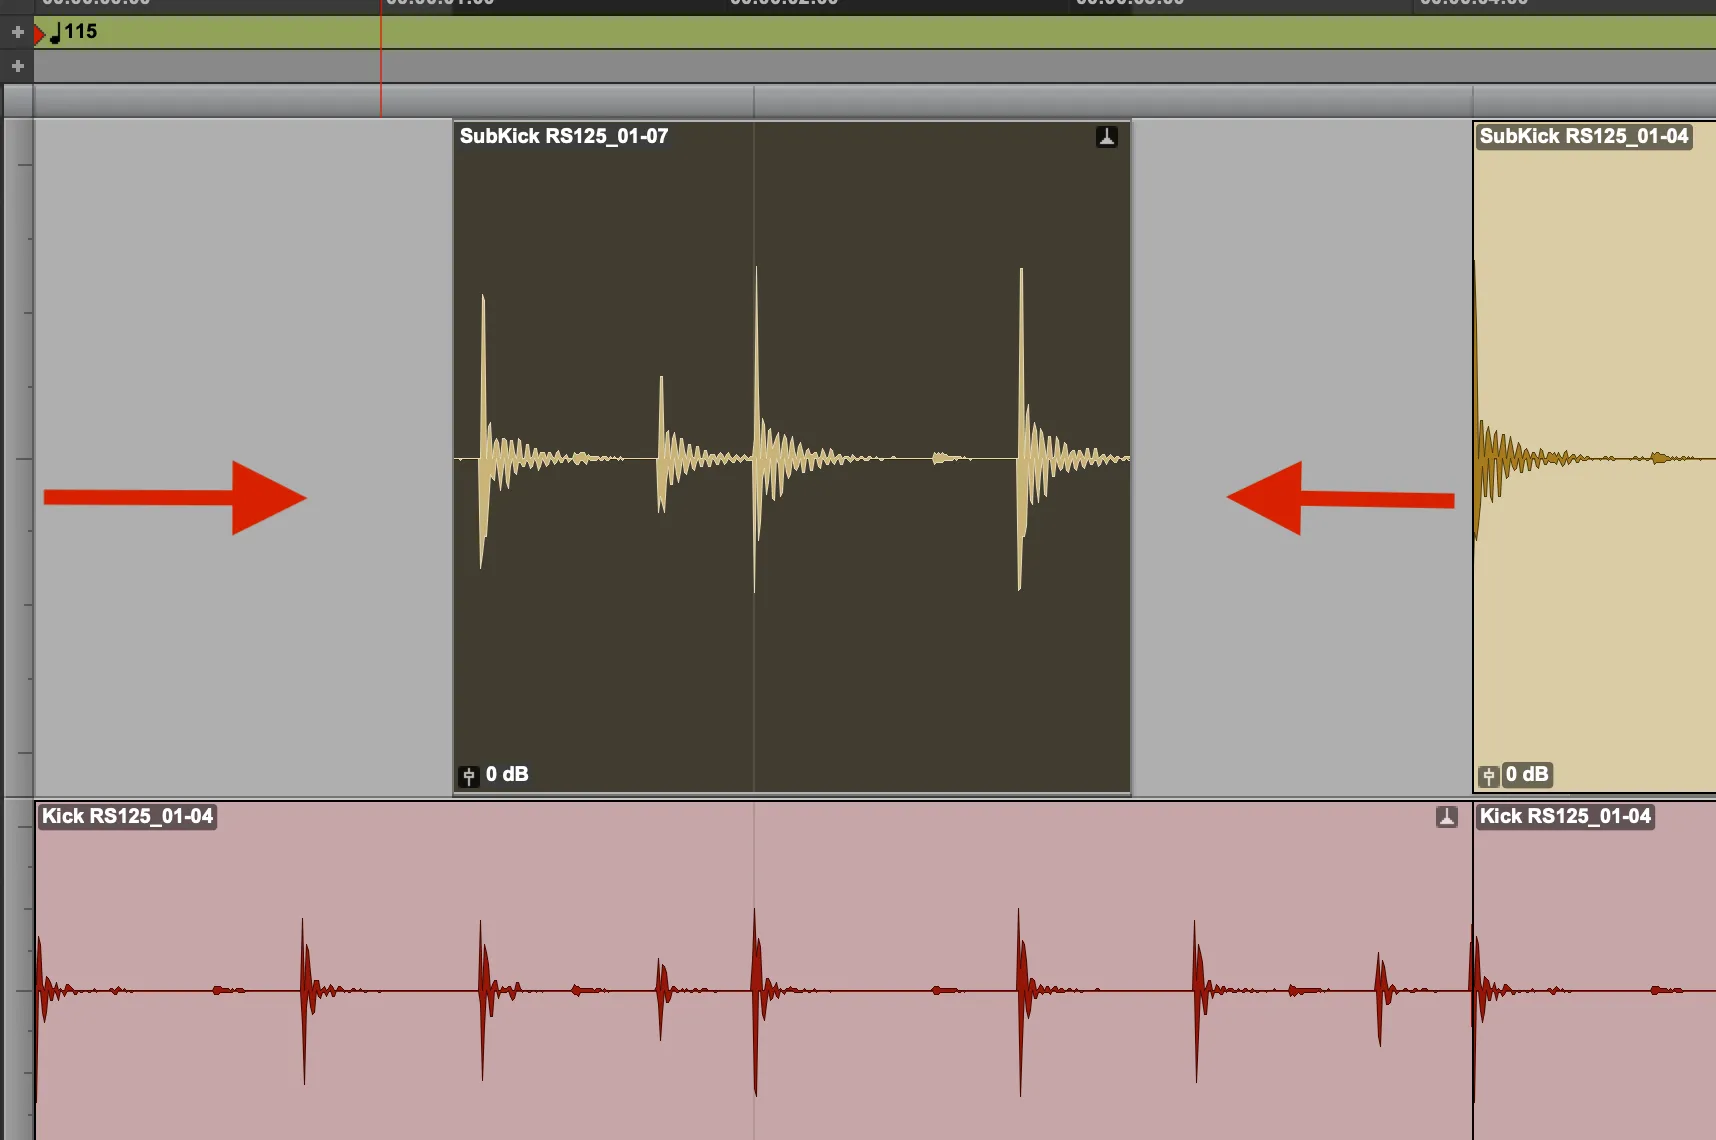
In the example below, we have an audio clip the needs to be edited from the beginning and end, leaving only a portion in the middle. Notice how once the edit is completed, the clips around our edit remain in their original place.
Step 1: Trim end of clip
Step 2: Trim beginning of clip
Notice how the clip after our edit remained in its original spot.
If we wanted to, we could drag the audio clip back out to it full length by dragging the ends away from the center.
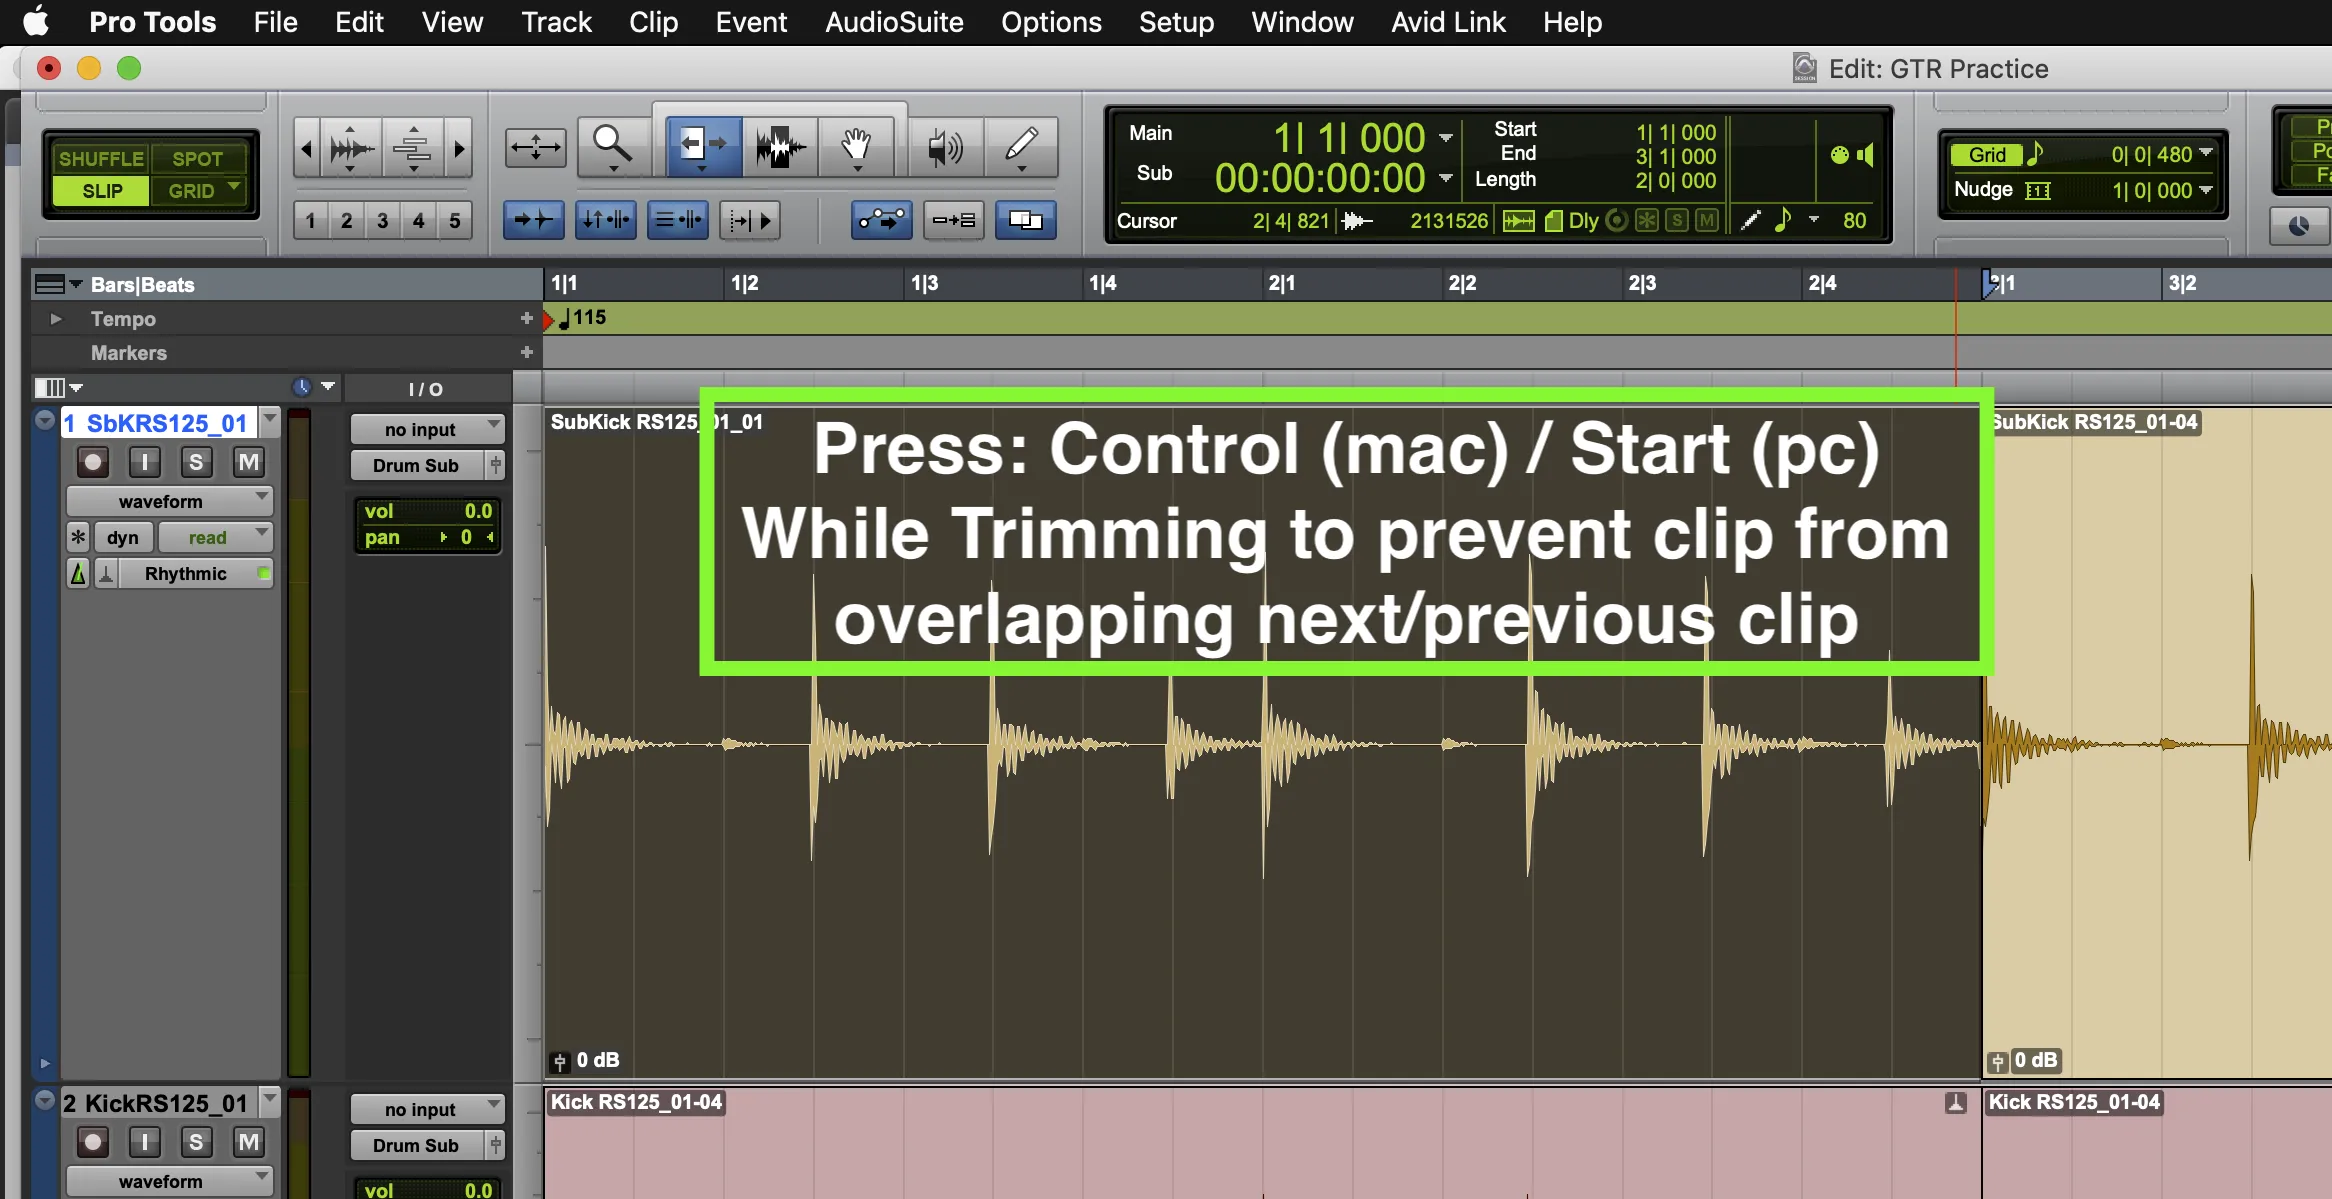
Due to the fact we are in SLIP Mode, the audio clip can be dragged on top of the next clip, creating a new edit, without the clips shifting position in time. This can create a problem at times, especially if you don't want to overlap on top of a another clip. Lucky for you there is a keyboard shortcut: press Control (mac) / Start (win) to prevent the trimmed audio clip from overlapping onto another clip
SHUFFLE Mode
The biggest difference between Shuffle and Slip Mode is what happens to the clips around the edit once you are done. In Shuffle Mode, all of the audio clips after the edit shuffle earlier in time. This mode not only edits the audio clip, it also moves everything to the right of the edit earlier in time by the edit amount. Think of Shuffle as if you were shuffling a deck of cards, when you remove a card from the bottom, the remaining cards shuffle down.
In the example below, you can see this in action. Once the audio has been trimmed from the beginning of the clip, the clip shift earlier in time by the edit amount, as well as the rest of the clips after the edit shifting earlier in time.
Example: we start off with this set of clips
Next: we trim the beginning of the clip
Result: edited clip, and rest of clips on track, shuffle earlier in time
Make sure to be aware of which editing mode you are working in, especially with Shuffle Mode. Due to the shuffling movement of audio clips on the track, this can wreak havoc on your project. Imagine editing a drum track in Shuffle Mode, and how badly this would throw the drums off-time from the rest of the tracks.
SPOT Mode
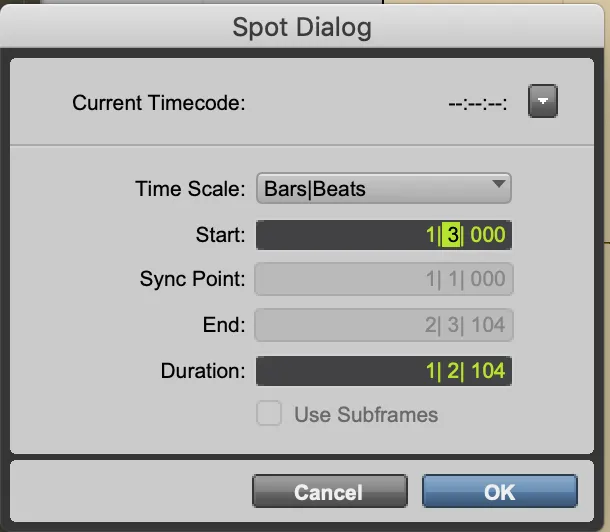
In many ways, SPOT Mode is very similar to Slip: nothing moves around in time when you edit, and edits can overlap on top of other clips. The biggest difference when working in Spot Mode is the window that pops up every time you try to create an edit. Instead of allowing you to freely move the edit by hand with your mouse, Spot Mode requires you to type in the Time variable for the edit.
The example below shows you how the Trim Tool works with Spot Mode.
Example: we need to Trim the beginning of the clip to start at 1|3|000
When we click on the audio clip with the Trim Tool the following dialogue window appears:
We have to type in the time variable we want the edit to start at: in our example we are using 1|3|000 as the edit start
GRID Mode
Unlike other modes that require special attention when editing, Grid Mode is very similar to Slip. It doesn't shuffle any audio clips in time, and it doesn't require the input of any time properties. The biggest difference when working in Grid Mode is that all edits snap to a Grid value. This value can be based on different time-base rulers such as Bar|Beat, Minutes:Seconds, Timecode, etc...
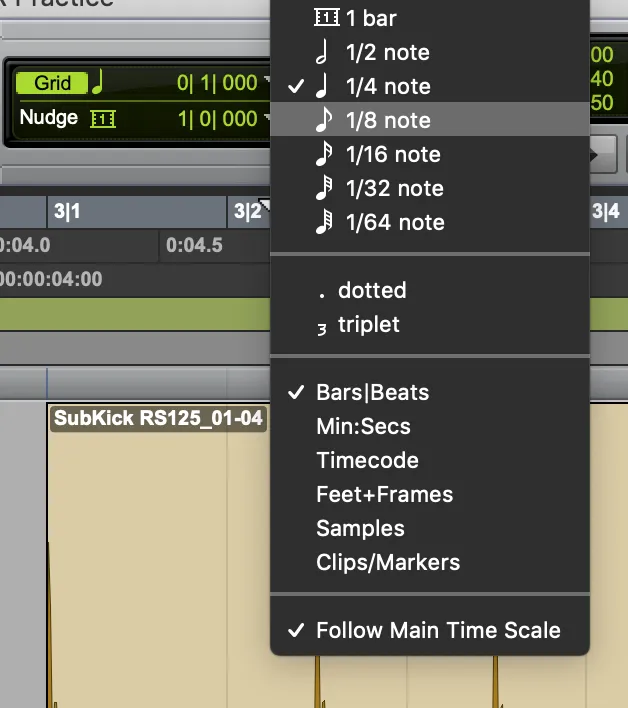
You can change the Grid value to increase or decrease the edit density per second, or beat. For example: if you are using the Bars|Beats timescale, you can change the edit grid from 1-bar, to 1/2 note, 1/4 note, 1/8 note, 1/16 note, 1/32 note, or 1/64 note. If you are working in the Minutes:Seconds timebase, you can change the edit grid from 1-sec, to 500-msec, 100-msec, all the way down to 1-msec.
Click on the Grid Value selector at the top of the Edit Window to change the Grid density when working in Grid Mode.
In the picture below, notice the vertical blue grid lines. When you Trim an audio clip, the boundaries will snap to the grid line. This is useful in all aspect of audio production as most things tend to be on a set timebase. This edit mode allows you to make sure the edits you are trimming fall exactly on increments of time, without guessing.
Other than the Grid restrictions, you are free to edit audio without fear of anything moving around as a result. You will find that all professional audio engineers use Grid Mode, regardless of whether a project is music based, or video post-production. In music, Grid Mode allows you to edit on exact increments of a measure, and in Post Production, Grid Mode allows you to edit on exact frames of video to make sure audio and video are in perfect time with one another.
Join us next week for part 2 of this article where we look at how the various Trim Sub-Tools work and how you can use them in your Pro Tools workflow
- Mihai Boloni Avid Certified Expert Pro Tools Instructor
Live Online and Hands-On, In Class Pro Tools Training Available -
Promedia Training offers Pro Tools Training, from beginner to advanced, including Avid Pro Tools Certification and is an official Avid Training Facility. Learn Recording, Editing and Mixing in Pro Tools and take your Music Production to the next level.
Perfect for singers, songwriters, musicians, producers, and audio engineers, including Expert Level Training.
5)Private Training- Arranged in office; please call 888-277-0457.
For Over 20 years, ProMedia has ben an official Avid Training and Certification Center working with beginners to the most advanced users with weekend and short-term Pro Tools Courses.
Beginner's On A Budget Pro Tools Fundamentals Course Overview: PT100
Mihai BoloniCreative Director & Avid Expert Pro Tools instructor
Mihai has made it his life's work to help others in the audio industry. Mihai gained experience as an audio engineering Full Sail Instructor in early 2000's and joined ProMedia in 2002. He is now regarded as one of Avid's leading and most experienced, in-demand Instructors and Pro Tools technical consultants for complex studio configurations. Corporate clients include MTV, PBS, NBC, Telemundo, The Voice's Chief Engineer Mike Bernard, Atlanta Public School System, countless professors from leading Universities, CNN, Turner Broadcasting, and the top producers, artists, and engineers in leading studios and record labels. For over 20 years, Mihai has continued to work as an Audio Engineer, Record Producer, Songwriter (ASCAP), Dog Lover, and Expert Level AVID Certified Pro Tools Instructor.